Bloodhound SSC Engineer Chris Hannon investigates the adhesives used in bonding the components of the lower chassis together, and presents his technical assessment
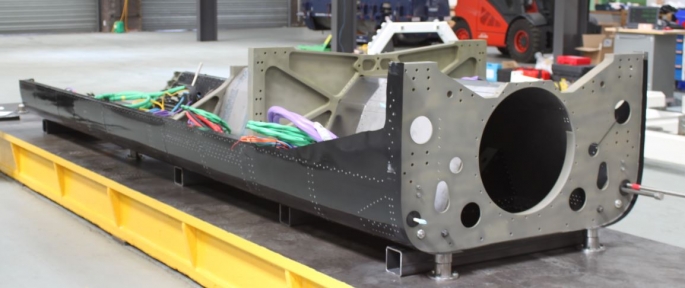
Bloodhound’s lower chassis is a fabricated structure made largely from steel sheet and aluminium alloy machinings. Fasteners alone are enough to satisfy the lower chassis structural requirements; however, an adhesive was necessary to increase the stiffness of the structure.
Bloodhound SSC shall be operating at top speed for a matter of seconds and thermal lag means the lower chassis should stay relatively cool while the car is moving. A thermal characterisation study of the adhesive for a variety of cure profiles resulted in a cure profile tailored to meet Bloodhound’s specific requirements.
Adhesive Selection and Use
A thermal expansion assessment of the lower chassis had been performed by the design team, which showed steel panels on the lower chassis were likely to buckle due to exceeding their allowable compressive stress. Therefore, a low adhesive curing temperature was desirable.
Hexcel Redux 312 adhesive was selected for use on the lower chassis by the team; this is a high strength 1-part epoxy adhesive which cures at 120°C in 30 minutes under a relatively wide pressure range. Redux 312/5 was used due to its low curing temperature and use of a woven nylon carrier (mesh) to control the bond line thickness. The adhesive comes in a roll from the manufacturer and is kept in a freezer at approximately minus 20°C. Small strips from this are cut off, defrosted, and then applied to the area to be joined.
Cure Pressure
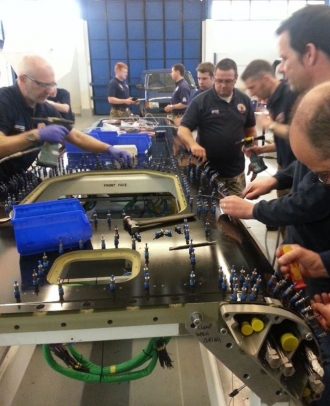 Picture 2: Lower chassis joints are both bonded using the pressure from the rivets
Normally a uniform cure pressure would be applied to the adhesive joints, either from a uniform clamping load or a vacuum bag/autoclave, as was used to cure the car’s carbon fibre monocoque. The cost associated with building a jig to prevent the thin steel panels buckling under vacuum and externally applied pressure was deemed too high by the design team, so the cure pressure came from the rivets alone, which periodically squeezes the adhesive along a joint (Picture 2).
Testing
Even a 120°C cure had a reasonably high risk of buckling the chassis, so the cure temperature would ideally be reduced to 80°C. When curing at a lower temperature the cure time is increased to maximise polymerisation (the chemical reaction turning individual monomers into complex polymer chains). Sub-optimal cure temperatures are unlikely to achieve 100% polymerisation but this is not necessarily a problem for a specific application.
The trouble with curing adhesive at a lower temperature is that its mechanical properties can be reduced compared to an optimum cure. Two key risks of reduced performance that are applicable to Bloodhound are:
• Reduced strength
• Lower maximum service temperature (above which the adhesive loses much of its stiffness)
Tests have been conducted to look at both of these.
 Picture 3: Tensile test machine at Swansea University
Strength Testing
A variety of lap shear coupons were pulled apart using a tensile test machine in the Heavy Structures Laboratory at Swansea University (Picture 3). This gave the strength of the adhesive for a particular cure profile and we tested several along the lines of:
• Optimum cure at 120°C for 30 minutes
• Cure at 80°C for 5 hours
What we saw was that the strength of the joint decreased slightly when cured at the lower temperature, but was still about double the acceptable minimum, so in terms of shear strength, it was OK to cure the adhesive at a lower temperature.
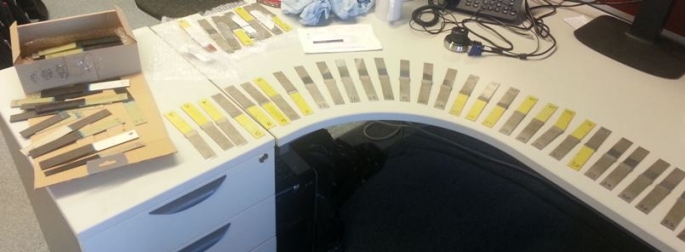 Picture 4: Lap shear tensile test coupons post test
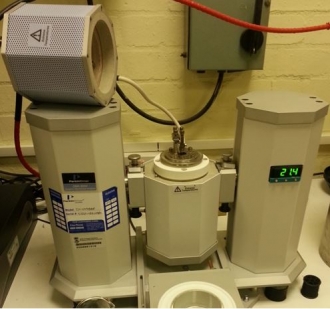
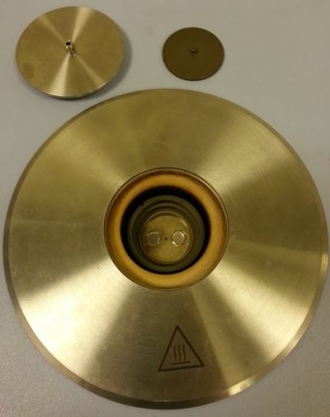 Picture 5: DSC
Thermal Assessment
The Thermal Characterisation Laboratory at Swansea University was utilised to investigate the cure kinetics of the adhesive for different cure profiles.
Differential Scanning Calorimetry (DSC) calculated the extent to which samples were cured, as well as assessed the optimum curing time for the adhesive when maintained at 80°C. 20 mg samples of adhesive were weighed on an analytical balance and placed in the DSC (Picture 5)
The DSC can gradually heat up the sample by putting in a known amount of heat energy and measuring the temperature change, which gives you the specific heat. Polymerisation of the adhesive is an exothermic process (it gives out heat), so if the adhesive is curing, we can see by how much. Figure 6 shows two sample curves; the curve for the uncured adhesive shows a clear spike that peaks around the optimum curing temperature. The area under this curve is the enthalpy and is a baseline against which cured samples are compared to determine how complete a cure is. For example, the area under the blue curve is much smaller than under the red curve, so we can say that the cure is partial, but mostly complete.
 Figure 6: Typical DSC results for cured and uncured adhesive
If instead the uncured adhesive is held at a constant temperature in the DSC, we can determine for how long to cure the adhesive until polymerisation will no longer take place. For our adhesive, this was 13 hours at 80°C.
Dynamic Mechanical Analysis (DMA) (Picture 7) was used to investigate the Glass Transition Temperature (Tg) of the adhesive when subjected to an increasing temperature. Cantilever samples of the adhesive were oscillated at a given stress; as the sample is heated up, at some point the material will soften and lose its stiffness. Ideally this temperature should be as high as possible, so that the chassis can maintain its stiffness over a wider range of temperatures.
 Picture 7: Dynamic Mechanical Analysis with heater removed
Figure 8 shows that the adhesive lost most of its stiffness at about 60°C when cured for 5 hours. This was increased to around 80°C when the cure time was increased to 13 hours, which is a far more useful temperature limit.
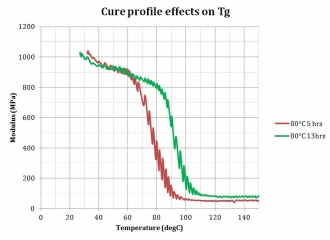 Figure 8: Sample DMA results – optimising cure time maximises service temperature
Cure of the Lower Chassis
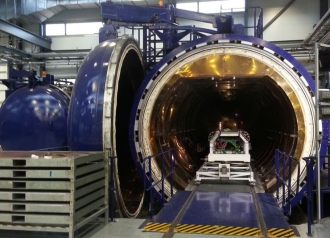 Picture 9: Lower chassis in the NCC autoclave
The National Composites Centre’s (NCC) large autoclave was used to cure the lower chassis (Picture 9). The curing temperature was lower than a typical cure and it was found that the heat put into the system by the fans was sufficient to raise the temperature for the cure, rather than also having to burn gas. The tolerance of the autoclave operating in this regime was several degrees, so it was agreed to increase the cure temperature to 85°C. Based on additional thermal characterisation of the adhesive with a 90°C cure, the cure profile was finalised by the design team at 85°C for 8 hours.
A series of lap shear coupons was placed in the autoclave to verify the strength of the cure. The strength values were again at least twice the acceptable minimum; along with inspection of the chassis by the team this indicates the cure of the lower chassis was a success.